
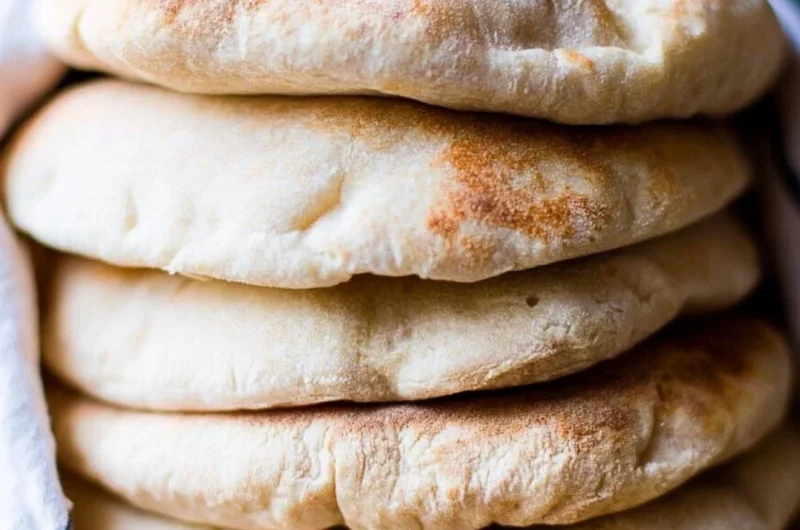
Cozy Sourdough Pita Bread
There’s something incredibly comforting about the warm embrace of freshly baked bread, especially when it’s homemade Sourdough Pita Bread. The moment you take that first bite, you’re greeted with a tender, pillowy texture and a hint of that delightful sour tang that only a well-fed starter can provide. This recipe brings back memories of long Sunday afternoons in my grandmother’s kitchen, where the smell of yeasty dough rising would fill the air, wrapping us in a warm, nostalgic blanket. Making these pitas together was always a highlight of my childhood; they’d puff up beautifully in the oven, awaiting our eagerly outstretched hands.
Whether you’re packing them for a cozy picnic or using them for tasty dips and sandwiches, this Sourdough Pita Bread is an easy weeknight dinner staple you won’t want to miss. This is one you’ll definitely want to pin for later!
Why You’ll Love This Recipe
- Quick: With just a few simple steps, you’ll have soft, warm pitas ready in no time.
- Crowd-Pleasing: These pitas are perfect for gatherings, whether served with hummus or stuffed with your favorite fillings.
- Nutritious: Whole wheat flour adds a wholesome touch, making these pitas a healthier option.
- Versatile: Great for sandwiches, wraps, or just enjoying with soups and stews.
- Eco-Friendly: Using a sourdough starter reduces waste and creates a lovely, tangy flavor.
Ingredients You’ll Need for Sourdough Pita Bread
- 2 cups all-purpose flour
- 1 cup whole wheat flour
- 1 teaspoon salt
- 1 tablespoon olive oil
- 1 cup sourdough starter (fed and doubled in size)
- 1/2 cup warm water
Step-by-Step Instructions
In a large bowl, combine the all-purpose flour, whole wheat flour, and salt. The dry ingredients create the perfect base for a tender pita.
Add the sourdough starter, olive oil, and warm water. Mix until a dough forms, enjoying the smell of the ingredients mingling together.
Knead the dough on a floured surface until smooth and elastic, about 5-10 minutes. Your hands will love that lovely texture!
Place the dough in a lightly greased bowl, cover it, and let it rise until doubled in size, about 1-2 hours. Take this time to sip on a warm beverage and enjoy the anticipation.
Preheat your oven to 475°F (245°C) with a baking stone or baking sheet inside. This step is crucial for that perfect puff.
Punch down the risen dough and divide it into 8 equal pieces. Shape each piece into a ball and allow it to rest for 10 minutes. Let the dough relax—much like you!
Roll each ball into a round disk about 1/4 inch thick. Don’t worry about perfection; these rustic shapes have their own charm.
Place the disks on the preheated stone or baking sheet and bake for 3-5 minutes or until they puff up and are lightly golden. The sight will be pure magic!
Remove from the oven and cover with a clean towel to keep soft. The steam will work wonders on that tender texture.
Serve warm or use for sandwiches and dips. Try pairing them with homemade hummus for an indulgent treat.
Delicious Variations to Try
- Herbed Pita: Add dried oregano, thyme, or rosemary to the dough for a fragrant, earthy flavor that elevates your dips.
- Spicy Pita: Incorporate a pinch of cayenne or smoked paprika to the dough for a zesty kick.
- Cheesy Delight: Fold in crumbled feta or shredded cheese right before baking for gooey, indulgent bites.
- Sweet Pita: Adjust the recipe by adding a bit of honey and cinnamon for a delightful dessert option, perfect for dipping in yogurt.
Chef Emma’s Helpful Tips
- Make-Ahead Tip: You can prepare the dough in advance and let it rise overnight; just refrigerate it after mixing. It will be ready to bake the next day!
- Ingredient Swaps: If you don’t have whole wheat flour, you can use all-purpose flour instead, but it’ll change the flavor slightly.
- Storage Suggestion: Store leftover pitas in an airtight container at room temperature for up to 2 days. They can also be frozen; just reheat in the oven for the best results!
What’s Inside – Nutrition Breakdown
- Serving Size: 1 pita
- Calories: 150
- Carbs: 28g
- Sugar: 0g
- Fat: 3g
- Protein: 5g
- Sodium: 160mg
Frequently Asked Questions
Can I make this ahead?
Yes! You can prep the dough and let it rise overnight in the fridge for convenience.
Can I use different ingredients?
Feel free to experiment with other flours, just keep in mind that whole wheat flour adds a different texture and flavor.
How do I store leftovers?
Store pitas in an airtight container for up to 2 days, or freeze them for later enjoyment.
How long does it last?
Pita bread is best enjoyed fresh, but it can last up to 2 days at room temperature and can be frozen for up to a month.
A Cozy Closing Note
Baking Sourdough Pita Bread is not just about food; it’s about bringing love and warmth into your home. This recipe not only nourishes the body but also fills the heart with sweet memories and comforting flavors. Save this Sourdough Pita Bread to your cozy recipes board so it’s ready when you need a delightful treat! Enjoy every tender, warm bite!
Cozy Sourdough Pita Bread
- Total Time: 30 minutes
- Yield: 8 servings 1x
- Diet: Vegetarian
Description
Homemade Sourdough Pita Bread with a tender, pillowy texture and a delightful sour tang, perfect for sandwiches, dips, or enjoying on its own.
Ingredients
- 2 cups all-purpose flour
- 1 cup whole wheat flour
- 1 teaspoon salt
- 1 tablespoon olive oil
- 1 cup sourdough starter (fed and doubled in size)
- 1/2 cup warm water
Instructions
- Combine the all-purpose flour, whole wheat flour, and salt in a large bowl.
- Add the sourdough starter, olive oil, and warm water. Mix until a dough forms.
- Knead the dough on a floured surface until smooth and elastic, about 5-10 minutes.
- Place the dough in a lightly greased bowl, cover it, and let it rise until doubled in size, about 1-2 hours.
- Preheat your oven to 475°F (245°C) with a baking stone or baking sheet inside.
- Punch down the risen dough and divide it into 8 equal pieces. Shape each piece into a ball and allow it to rest for 10 minutes.
- Roll each ball into a round disk about 1/4 inch thick.
- Place the disks on the preheated stone or baking sheet and bake for 3-5 minutes until they puff up and are lightly golden.
- Remove from the oven and cover with a clean towel to keep soft.
- Serve warm or use for sandwiches and dips.
Notes
You can prepare the dough in advance and let it rise overnight in the fridge. Store leftover pitas in an airtight container at room temperature for up to 2 days.
- Prep Time: 15 minutes
- Cook Time: 15 minutes
- Category: Bread
- Method: Baking
- Cuisine: Mediterranean
Nutrition
- Serving Size: 1 pita
- Calories: 150
- Sugar: 0g
- Sodium: 160mg
- Fat: 3g
- Saturated Fat: 0g
- Unsaturated Fat: 2g
- Trans Fat: 0g
- Carbohydrates: 28g
- Fiber: 3g
- Protein: 5g
- Cholesterol: 0mg